前面我们聊过用 树莓派从Internet 服务器上获取信息。下面我们来试试让树莓派作为服务器对外提供信息。
我的住所养了四盆植物,老是忘记浇水,而奄奄一息。有必要开发一款自动浇花系统。希望实现以下功能:
1. 每盆植物都具备土壤湿度传感器,当土壤变干,达到一个值的时候自动实现浇花。并且可以在Web界面显示各个花盆的土壤湿度数据。
2. 具备室内温湿度传感器,可以在Web界面显示。同时这个数据也可以做一些逻辑,例如温度达到多少的时候不能浇花。(土壤温度太高浇水容易损害植物) 。
3. Web界面具备手动浇花的功能,有时候看看土壤湿度,手动浇浇花,还是很有乐趣的,你也可以将权限开放给朋友让他试试浇花。
4. 具备一个摄像头,能将当前的花园图片上传到Web界面显示, 朋友们也可以看看你的花园呢。
5. 技术方面,登录界面需要有用户名和密码输入校验功能。可以实现外网控制。
下面是需要的一些材料:
1. 树莓派主板 1只
2. DFRobot 新推出的Raspberry Pi Meet Arduino 扩展板 1只
3. 数字继电器模块 4只
4. 土壤湿度传感器 4只
5. Si7021温湿度传感器 1只
6.带水管潜水泵 4只
Raspberry Pi 基于Liunx 可以安装多种 Web框架,他将Web界面的设计和 Python代码分离开来,通过Web框架来编写Web项目非常方便。
Python 可以使用的Web框架有 Django、Web2PY、Web.py、Flask。
在这里使用Flask (http://flask.pocoo.org),它是一个简洁的Web框架。
安装Flask需要安装pip。如果没有安装可以用下面的命令安装:
- root@raspberrypi:/home/pi# apt-get install python-pip
安装Flask:
- root@raspberrypi:/home/pi# pip install flask
建立一个名为 webwatering.py 的文件
- #!usr /bin/python
-
- import RPi.GPIO as GPIO
- from flask import Flask,render_template,request
- app = Flask(__name__)
-
- GPIO.setmode(GPIO.BCM)
- pins = {
- 24 : {'name' : 'banian','state' : GPIO.LOW},
- 25 : {'name' : 'jasmine','state' : GPIO.LOW}
- }
-
- for pin in pins:
- GPIO.setup(pin,GPIO.OUT)
- GPIO.output(pin,GPIO.LOW)
-
- @app.route("/")
- def main():
- for pin in pins:
- GPIO.setup(pin,GPIO.OUT)
- GPIO.output(pin,GPIO.LOW)
-
- @app.route("/")
- def main():
- for pin in pins:
- pins[pin]['state'] = GPIO.input(pin)
- templateData = {
- 'pins' : pins
- }
- return render_template("main.html",**templateData)
-
- @app.route("/<changePin>/<action>")
- def action(changePin,action):
- changePin = int(changePin)
- deviceName = pins[changePin]['name']
- if action == "on":
- GPIO.output(changePin,GPIO.HIGH)
- message = " Truned " + deviceName + " on. "
- if action == "off":
- GPIO.output(changePin,GPIO.LOW)
- message = " Turned " + deviceName + " off. "
- if action == "toggle":
- GPIO.output(changePin,not GPIO.input(changePin))
- message = "Toggled " + deviceName + "."
-
- for pin in pins:
- pins[pin]['state'] = GPIO.input(pin)
- templateData = {
- 'mesage' : message,
- 'pins' : pins
- }
- return render_template("main.html",**templateData)
-
- if __name__ == "__main__":
- app.run(host="192.168.1.118",port=80,debug=True)
在 webwatering.py 同目录建立一个 templates 文件夹 ,在里面建立一个main.html的文件,内容如下:
- <!DOCTYPE html>
- <head>
- <title>Web Watering Status</title>
- </head>
-
- <body>
- <h1>Web Watering Status</h1>
-
- {% for pin in pins %}
-
- <p>The {{ pins[pin].name }}
- {% if pins[pin].state == true %}
- is currently on (<a href="/{{pin}}/off">turn off</a>)
- {% else %}
- is currently off (<a href="/{{pin}}/on">turn on</a>)
- {% endif %}
- </p>
-
- {% endfor %}
-
- {% if message %}
- <h2>{{ message }}</h2>
- {% endif %}
- </body>
-
- </html>
运行 webwatering.py
- root@raspberrypi:/home/pi/webwatering# python webwatering.py
- webwatering.py:14: RuntimeWarning: This channel is already in use, continuing anyway. Use GPIO.setwarnings(False) to disable warnings.
- GPIO.setup(pin,GPIO.OUT)
- * Running on http://192.168.1.118:80/
- * Restarting with reloader
- webwatering.py:14: RuntimeWarning: This channel is already in use, continuing anyway. Use GPIO.setwarnings(False) to disable warnings.
- GPIO.setup(pin,GPIO.OUT)
- 192.168.1.207 - - [22/Jun/2014 21:16:19] "GET /25/on HTTP/1.1" 200 -
- 192.168.1.207 - - [22/Jun/2014 21:16:22] "GET /25/off HTTP/1.1" 200 -
- 192.168.1.207 - - [22/Jun/2014 21:16:22] "GET /favicon.ico HTTP/1.1" 404 -
- 192.168.1.207 - - [22/Jun/2014 21:16:22] "GET /favicon.ico HTTP/1.1" 404 -
- 192.168.1.207 - - [22/Jun/2014 21:16:23] "GET /24/on HTTP/1.1" 200 -
- 192.168.1.207 - - [22/Jun/2014 21:16:24] "GET /24/off HTTP/1.1" 200 -
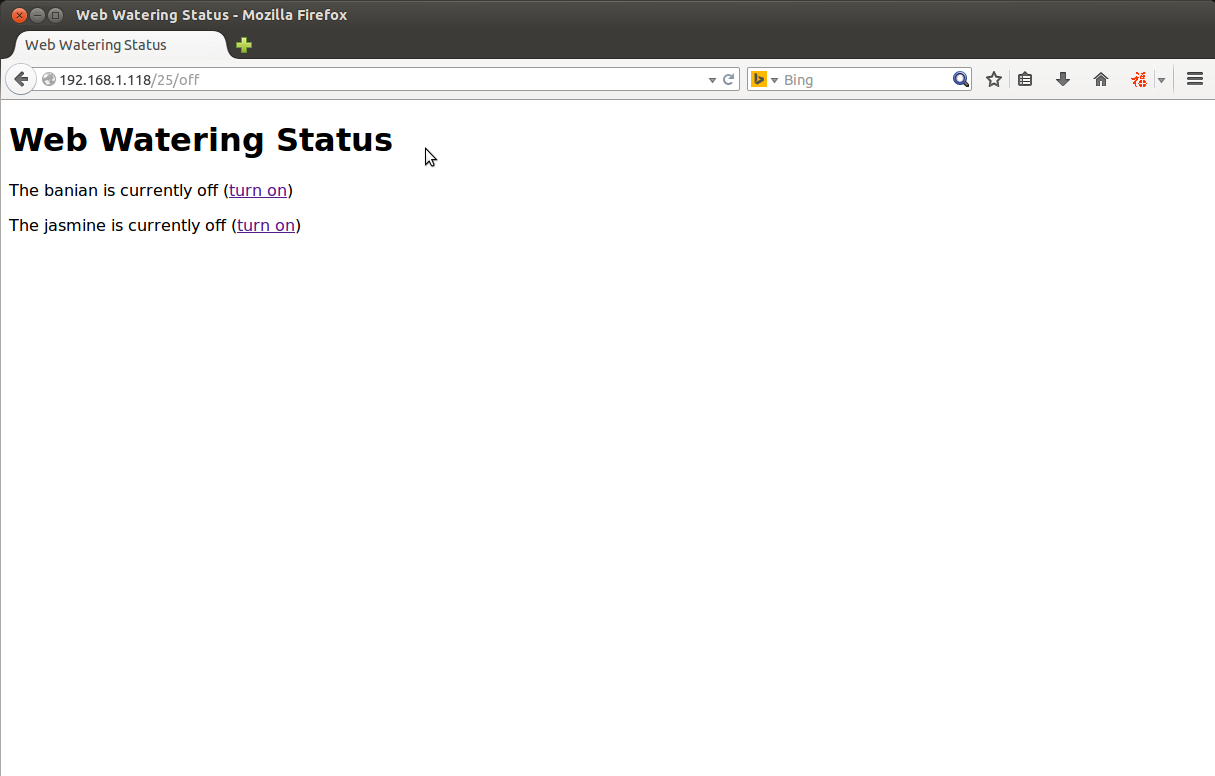
在浏览器输入192.168.1.118:80 点击按钮即可对 链接到GPIO24和GPIO25上的两个继电器模块进行控制
未完待续............
|  编辑选择奖
编辑选择奖
 编辑选择奖
编辑选择奖


 置顶卡
置顶卡 变色卡
变色卡 千斤顶
千斤顶


